To make a digital menu board, you are going to need a computer, a list of the menu items you are looking to display, software to design your menu board and a digital signage display and/or player for the finished product.
Step 1: Start with a free account from a reputable digital signage software company
For this tutorial, we are going to create a free account with SmarterSign which will give us access to templates and design tools that are specific to digital menu boards. Simply go to https://www.smartersign.com and follow the "Start for Free" path to create your account.
Pro Tip: Even if you are a skilled designer with a strong background in Adobe Illustrator, you will save a lot of time building your menu board using digital signage software.
Once you log into your account, start planning out your menu board. Decide what items you want to feature and how you want to arrange them. At this point, you can get a better sense of how many screens would best display your offering. A typical QSR generally gets the best results from 3-4 screens but it is largely dependent on a few factors. The number of items, the preferred size of the screens used, and the physical space your menu boards will be located will determine your specific requirements. A huge benefit of digital menu boards is the ability to day part your menus so if you would like to feature (or not display) certain items during parts of the day, you can make greater use of the space on your display.
Have you claimed your free digital menu board consultation? Schedule a call with one of our digital menu board experts and we can discuss your specific needs, your space, and how to make the most out of digital menu boards.
Step 2: Choose a digital menu board template as a starting point
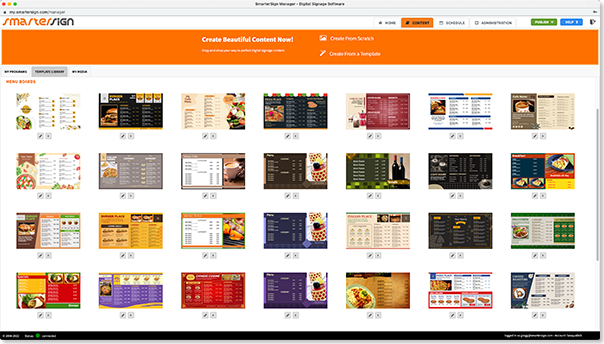
After you have logged into your SmarterSign account, click on the “CONTENT” tab to see all of the digital signage templates. Click on “digital menu boards” to show only relevant templates. When choosing a digital menu board template, you will need to determine if you want to create a landscape or portrait menu board. If you have existing screens already hung in your restaurant, then you need to match the orientation of those screens. The second is the overall look and feel of the template. You want to choose a template that is close to the branding of your restaurant. Don’t worry if it’s not an exact match. Every template is completely customizable and you can change backgrounds, fonts, and colors as well as add and remove images.

Step 3: Customize the template with your menu items and branding
Now that you have your digital menu board template, it’s time to customize it with your menu items and branding. To do this, simply click on the pencil icon and the template will open in the editor. You will notice that most of the digital menu board templates use the List widget which allows you to have an item name, description, and price points for each menu item. Change the default content out with your menu item and stylize it with the font and color that best fits your brand.
Once you have the first row stylized, you can duplicate and then simply change the text of the new row with your next item. Using this method you can quickly organize and reorder your menu items as you build out your menu. Click the “SAVE” button and give your menu a name and select a folder to save your menu.
Step 4: Set up your screen to display your menu
Now that you have your menu designed, it’s time to set up your screen to display it. Digital signage screens can help Here you have a few options:
Option 1: Use a Samsung SmartTV
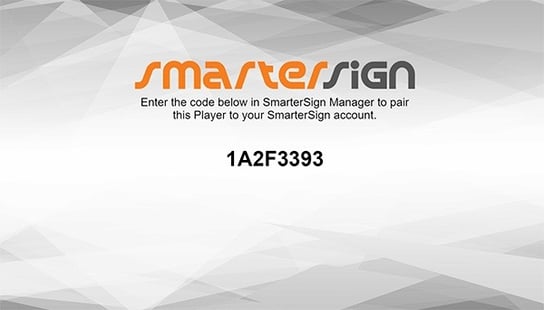
If you have a Samsung SmartTV, you can open the Samsung Smart Hub and download the SmarterSign Digital Signage Player App. Simply launch the app and a pairing code will appear on the screen.
Option 2: Use the SmarterSign Web Player
Most Smart TVs and streaming devices have a web browser built in that will allow you to display a web page full screen. Simply navigate to https://www.smartersign.com/player to launch the SmarterSign Web player. The page will display a pairing code on the screen.
Option 3: Use a digital signage player (Recommended)
A dedicated digital signage player is usually the best option for digital menu boards. Most players can run multiple screens and have more storage space, better graphics rendering, and offline playback. SmarterSign can be installed on many different platforms so just follow the installation instructions in SmarterSign Manager for your specific platform.
The Pairing Code

Enter the pairing code into SmarterSign Manager (look for the PAIR NOW button on the HOME screen). Once the player has been paired, use SmarterSign Manager to add your new menu to a playlist and hit “PUBLISH”. Within a few seconds, your menu will display on your screen. Any changes you make to your menu in SmarterSign Manager will immediately show up after you save and publish.
Congratulations! You’ve made your first digital menu board. Now you can explore SmarterSign Manager and start experimenting with some cool features like dayparting your menu as well as scheduling promotions and specials. A full help system is available right in SmarterSign Manager to help guide you through the process and unlock your screens’ potential.
