Using a Windows computer as a SmarterSign Player is a great way to get your content onto your Digital Sign. Follow the steps below to install the software onto your Windows computer and get started:
IMPORTANT – Before you get started
Make sure you are installing the SmarterSign Player on the computer that will control playback on your digital sign(s). You do not need to install this software on the computer that you will control content with. SmarterSign Manager (the software you use to create and schedule content) does not require any installation and is accessed through any web browser.
STEP 1 – Download the SmarterSign Player Installer
On the computer you will be using as your digital signage playback device go to the following link: https://www.smartersign.com/install
STEP 2 – Run the installer
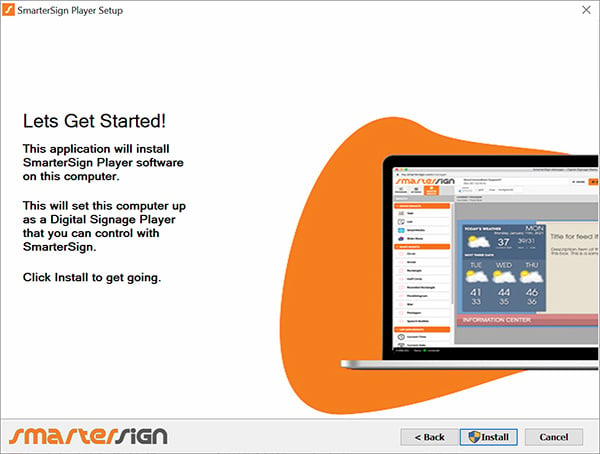
The installer will walk you through the steps to install SmarterSign Player software on your playback computer.

STEP 3 – Pair your SmarterSign Player
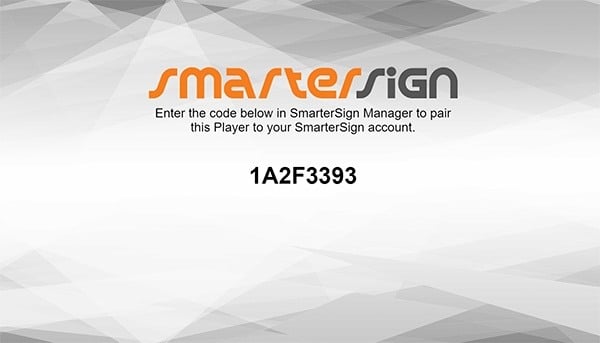
The SmarterSign Player software will automatically launch after installed. You will see a screen that contains a “pairing code” that looks like the screen below:
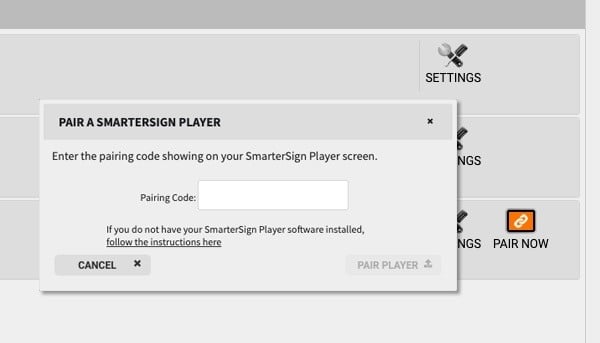
- Click the PAIR NOW button for your selected SmarterSign Player on the HOME tab in SmarterSign Manager
- Enter the Pairing Code from the SmarterSign Player and click “PAIR PLAYER”
- You should see the SmarterSign Player say “Pairing Successful”
- You are now connected and can publish content to your screen.
View on your SmarterSign Player

View in SmarterSign Manager (Web based management tools)

