Using a BrightSign device as a SmarterSign Player is a great way to get your content onto your Digital Sign. Follow the steps below to install the software onto your BrightSign Player and get started:
IMPORTANT – Before you get started
In order to get SmarterSign Player onto your BrightSign device you are going to need a Micro SSD card that will be placed into your BrightSign device. We recommend a Micro SSD card that has at least 64GB of storage.
STEP 1 – Download the SmarterSign Player Installer Files
Download the SmarterSign Player files for BrightSign using the link found HERE
STEP 2 – Unzip files and put them on your Micro SSD card
The .zip file you have downloaded in STEP 1 can be opened and the files in this archive can be placed onto your Micro SSD card.
STEP 3 – Place the Micro SSD card in your BrightSign device
There is a small slot on the BrightSign device that is used for your Micro SSD card. Make sure you push the card into the slot so that it stays in place. You should push it all the way in and it will release a little and lock in place. When this is done you can turn your BrightSign device on.
STEP 4 – Pair your SmarterSign Player
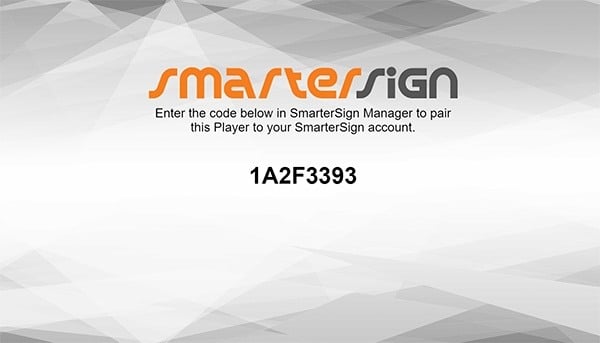
The SmarterSign Player software will automatically launch after installed. You will see a screen that contains a “pairing code” that looks like the screen below:
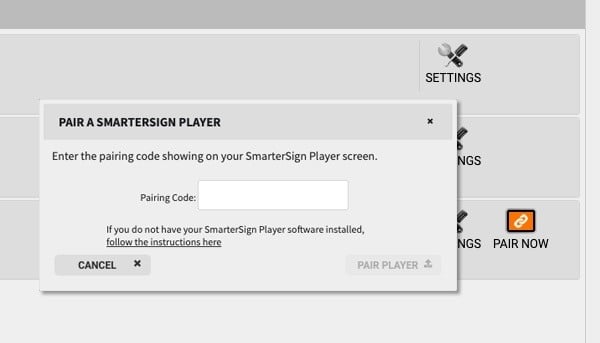
- Click the PAIR NOW button for your selected SmarterSign Player on the HOME tab in SmarterSign Manager
- Enter the Pairing Code from the SmarterSign Player and click “PAIR PLAYER”
- You should see the SmarterSign Player say “Pairing Successful”
- You are now connected and can publish content to your screen.
View in your SmarterSign Player

View in your SmarterSign Manager account

